Tag Archives: efficiency

Brew Stand Brew Day

It’s all come together! It is, for all intents and purposes, done. There certainly is some tweaking to do and a few bits and pieces on my wish list but it works and makes a bunch of beer in one go.

My last brew day I took some pics to show the set up. Some of the line set up is not pretty but that is part of the tweaking. I’ll just have to have a few more brew days to figure it all out. šŸ˜‰

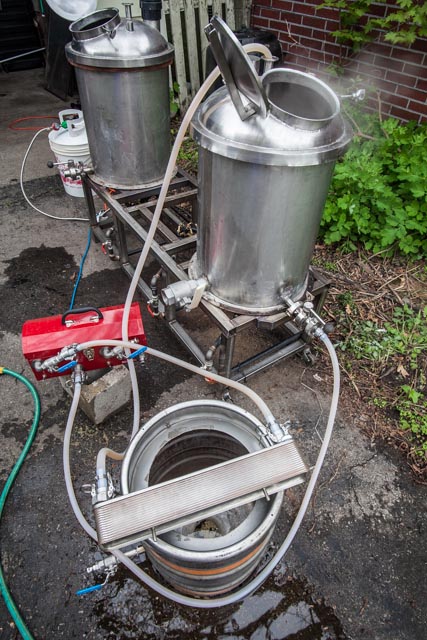
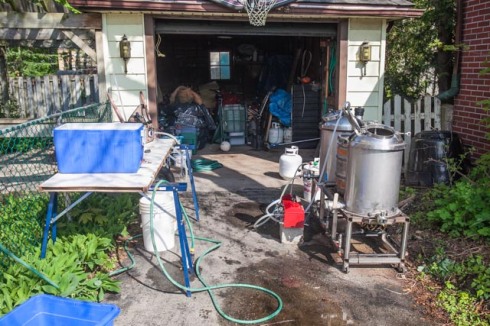
This is generally what my driveway/brewery looks like on a brew day. The blue cooler is no longer a MLT but is now a bin to tote material from inside: scale, chiller, pumps, etc.

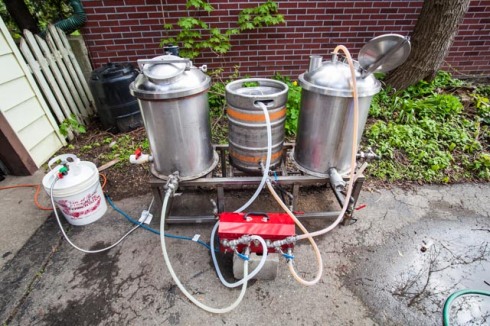
The Brewery

The Brewery


HLT set up for heating strike water. I recirculate the water as it’s heating just to avoid hot/cold layers. It makes the temp reading up top a bit more accurate. This is one place I could use an inline thermometer.

HLT

HLT


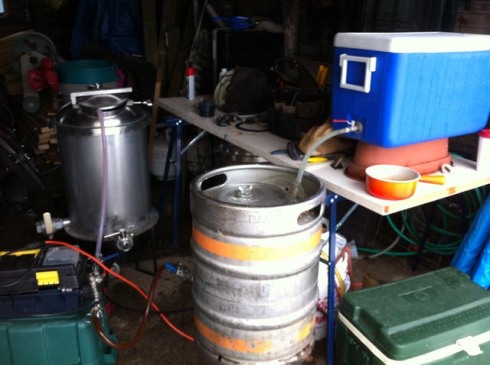
My fly sparge set up. HLT to pump to MLT. MLT to pump to BK. Flow adjusted so hot water into MLT is roughly the same rate as wort to BK. Works like a charm!

Fly sparge

Fly sparge


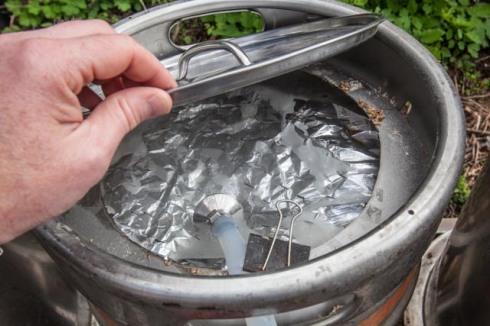
Top of MLT. Foil with holes just to avoid channeling in the grain bed.

Sparging

Sparging


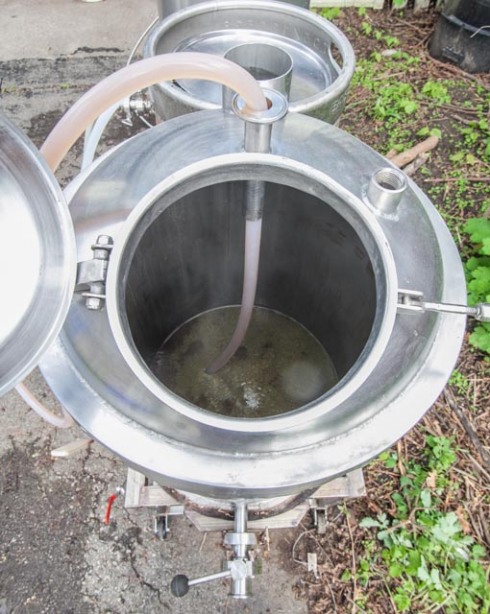
Lauter line into BK. I had originally had the line with the tri clamp fitting as the lauter line and had that attached to the top port. This set up is better with the line going to the bottom of the BK. Less splashing, less foaming, easier to see volume when the wort gets near the top.

Lautering

Lautering


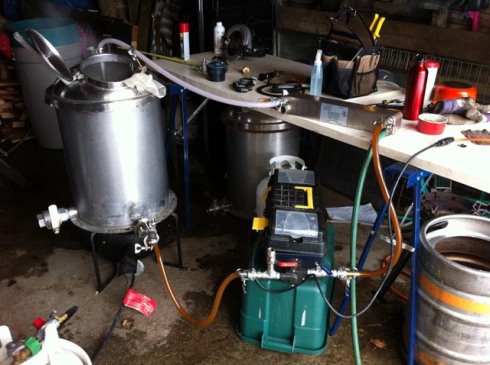
This is the set up for sanitizing the chiller. For the last 15 minutes of the boil I just recirculate wort through the lines and chiller. The line set up is not pretty and I’ll be tweaking that so that the moving of lines for cooling in and chasing wort with water is a bit easier and smoother. Using the MLT as a chiller stand was a last minute thought and works well. I had originally thought about mounting the chiller on the stand but knowing now how much back flushing is required it’s easier to have it loose for now.

Sanitizing Chiller

Sanitizing Chiller


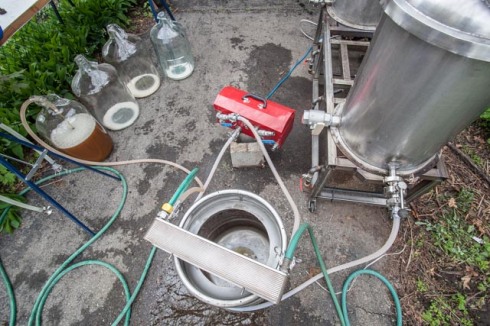
Set up for cooling in. This basically works. The line from BK to pump needs to be on the other side of the keg the chiller is sitting on. Part of my waste water from the chiller is going back into the HLT so that when wort is done in the BK I chase the wort through the lines with the water from the HLT. This is another place I would use an inline thermometer just to adjust the flow and get the pitching temps right, or at least close.

Cooling In

Cooling In

There you have it! That’s basically a brew day on my new set up. Thanks to Clay for the build and thanks to Scott for the gas plumbing and pump box! Fantastic work!

Maxed Out

With the brew stand nearing completion one of the things I wanted to do was run my large volume equipment through a brew day. This is not my complete setup, I used only one of the large vessels instead of both and I don’t have my pumps hooked up yet.

My process is pretty common with this setup:

  • heat large volume of water in HLT but what will become the BK
  • mash in with portion of hot water
  • add more water back to HLT and heat up for sparge
  • transfer all sparge water to coolers and empty the vessel
  • sparge from coolers into MLT and lauter into BK

This gives me two vessels to work with and the need for only one burner. I actually use two burners in case of the need to heat the MLT. The second time I brewed on this set up I didn’t need to heat the MLT but the first time I did.

Here are a few pics of the process…

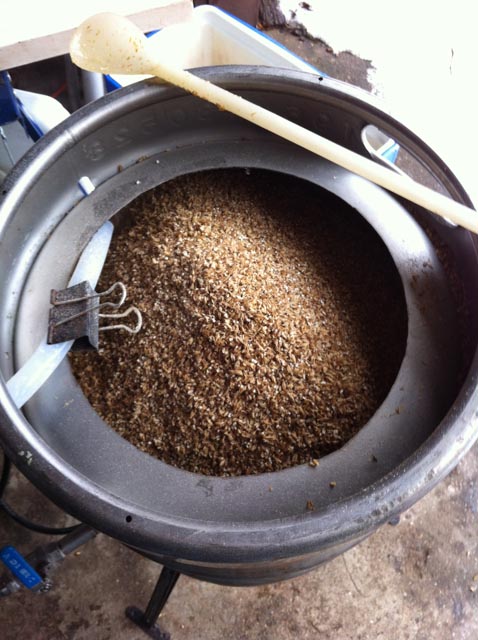
Mashed into a 50L keggle which according to my calculations would be able to hold 40lbs of grain. It did but it was completely MAXED out. No more room for anything! That was, in fact, my intent with this particular brew: max out every vessel to find out what my volume limits were. I found out. šŸ˜‰

MLT maxed out

MLT maxed out


Tried a new technique for me this time: fly sparging. It’s just setting the flow of sparge water to match the flow of lautering. Not difficult it’s just that I had never been set up for that before. Discovered it’s the best thing ever! It’s just too easy and there’s really no babysitting of the MLT or much scooping of water involved.

My fly sparge setup.

My fly sparge setup.


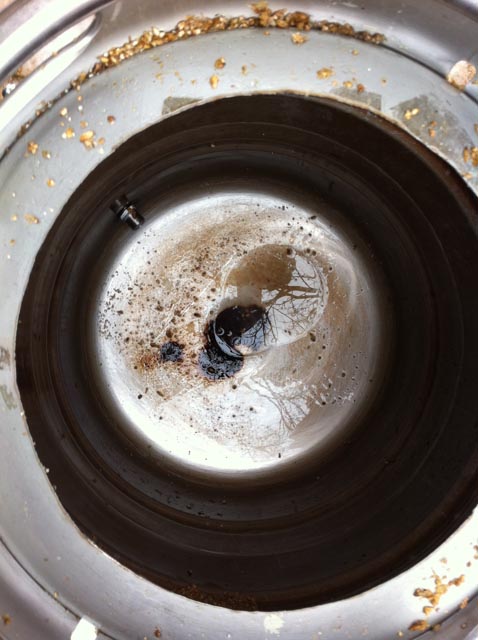
I did heat my MLT half way through the rest to bring the temp back up. With the MLT maxed out there was really no room for much stirring so I really didn’t have an accurate sense of the temperature. After emptying the MLT I did see that there was a bit of scorching evident but I’m sure I’ll still end up with beer.

Scorch!

Scorch!


Lautering and boiling were just fine and got to about 80L or so pre-boil. Another new addition to my set up is the plate chiller seen in this photo on the work bench. (The pump and burner are courtesy of Scott.) Sanitizing the plate chiller prior to chilling was dead easy. I just hooked everything up in the last ten minutes of the boil and ran the boiling wort through the system. This dropped the temp a bit and halted the boil for a minute or so but I just kept running the system and the boil came back. Super easy!

Sanitizing the chiller

Sanitizing the chiller


The chilling and cooling in itself was super easy. Once the boil was done I whirlpooled and rested (manually, just by stirring the BK). My chiller was already set up from the sanitizing stage so all I had to do was get my carboys in place and fire it up. With this set up and the water turned on about a half turn on the faucet I was able to cool and transfer the full volume of about 80L in just 10 minutes! You can also see it’s reasonably aerated, not something I’ve worried about a whole lot but it’s certainly not a gentle transfer.

Cooling in

Cooling in


There are a few things that will be changing with this setup and moving to the brew stand: My pumps will be wired in, burners will be in place, less moving of vessels, more space for me to move around. All of this… Soon.


New Tool

Not a really fancy new tool but more of a re-purposed tool.

I use binder clips for holding the hop bag to the side of the boil kettle. Late in the cooling process I take the hops out of the boil kettle and squeeze the last bit of wort out of them and put the binder clip back in my tool kit or on to the side of the boil kettle again. Today I discovered another use for it:

Binder clip thermometer holder

Binder clip thermometer holder

The thermometer just sits right there with the probe just far enough into the wort to get a decent reading. I stir my wort while it’s chilling so now I can see the progress without having to re-sanitize the thermometer every time I check the temp.

It’s not really a huge advance in my brew set up but it’s a fun little one that I discovered today.


Crushed

I had been hearing from a few other brewers recently about the speed at which they run their mills. Hearing about optimum speeds and not full speed or not too fast. I’m sure I had heard this before but probably not paid attention at the time as I was getting my grain pre-milled.

Now I’m milling my own grain on the brew day and having heard these discussions about milling speed finally decided to see what the fuss was about. I did do a bit of reading over at homebrewtalk.com (this thread) and it seems that there is much discussion (surprise, surprise) about rpms vs face roller speed. I also found this quote on http://www.theelectricbrewery.com/grain-mill:

Milling should be done at low RPMĀ (revolutions per minute)Ā to avoid shredding the husks. Somewhere around 150-250 RPMĀ (aroundĀ 2-4 turns/second)Ā is said to be a good compromise between the time taken and the amount of shredded husk material. At this speed it takes us approximately 2-3 minutes to mill the 15-20 pounds of grain required for a typical 10 gallon batch of beer.

I have to admit, I just wasn’t aware of that. Likely because I spent a fair bit of brewing time not having a mill. Once I did get a mill I just attached my drill and let ‘er rip… or crush, or whatever is supposed to happen.

So hearing about these points I decided to try my own rather non-scientific test to see if there was a difference. I attached my drill and did a run at it’s highest speed and a run at the lowest speed I could maintain. I then photographed the results:

Crush at highest drill speed

Crush at highest drill speed

Crush at slowest drill speed

Crush at slowest drill speed

I don’t really notice a difference.

Now, it may be that if I brewed a batch with a slow crush grist and a batch with a fast crush grist there might be difference in efficiency. It may also be something that is far more noticeable or applicable in larger scales like a commercial brewery would be dealing with. This may be like the many discussions that homebrewers have about hot side aeration.

I’ll leave it to you to assess the results and… Discuss.


Cool Invention!

I’m a bit behind the times on this one but I just saw this video that someone had posted to Homebrew Talk.


While I don’t bottle much at all, and when I do it’s almost always from the keg, I thought this was an ingenious idea. Here is the link to the company’s website.

Just a brilliant idea (wish I had thought of that. šŸ˜‰ )


Brewing and… Power tools!!

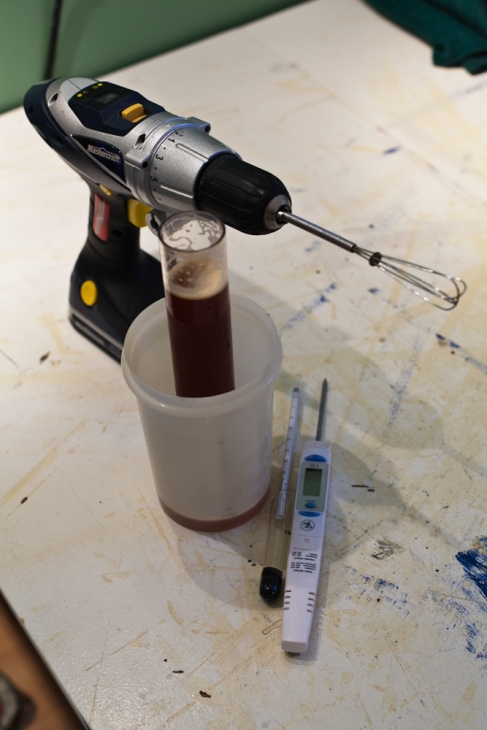
I’ve always loved brewing for the delicate balance between the artā€“creating recipes, balancing malts and hops, flavoursā€“and the scienceā€“target numbers, chemistry, temperaturesā€“and now… Power tools!!!

Image

Brewing and power tools

Today I was working with the science end of things. I needed to get a sample of finished beer to take readings and work backwards to get a starting gravity on the beer. With this information I could then calculate the %abv of the beer. One of the minor problems is that the finished beer is carbonated which can lead to inaccurate readings on the hydrometer with bubbles clinging to the outside of the hydrometer.

Now, I could have taken the sample and walked away for the day, let the sample warm up and de-gas on its own but I have a small whisk and a drill. It seemed obvious to me at the time to just put the two together and de-gas the beer sample. Worked like a charm! Got my reading, did my calculations and ended up with what apparently is a 13.3%abv beer. Ouch.

It’s what’s not on tap anymore…


Spargeless

Well… Not sure what to say about this brew day.

I took a stab at doing a no-sparge brew. Mixing all the grain (15lbs) with all the water I would need (7 gallons + absorption + deadspace) and draining everything after an hour rest and going with what I got.

No problems with the concept and everything proceeded smoothly. I took a pre-boil reading, which I never do, just out of curiousity and ended up with 1.072. My brewing software, BeerSmith, was estimating a preboil gravity of 1.065 on a regular batch sparge formula. I seemed to be WAY ahead of the game on this one!

In the little bit of reading that I had done, including this page, it seemed that I would end up with a lower efficiency and lower gravities on a similar quantity of grain for a no-sparge batch. My initial reading certainly didn’t show that.

I continued on with a pre-boil volume of 6.5gal which was a little below what I had estimated. Boiled for 60 minutes, cooled and drew a sample for OG reading and came up with 1.068. What?! I should have been somewhat higher than my pre-boil reading of 1.072, not lower. Something was not right…

Oh well. As I say most every brew day, “It’ll be beer.”

I like the idea of a no-sparge batch but in my set up doing stove top it was no time saver as had been reported by others. My stove takes too long to bring the full volume to a boil and usually that time is filled with lautering/sparging, so no savings there.

My MLT is plenty big enough to accommodate the quantities of grain and water involved by I do find the end result is somewhat less than manageable for me. A full mash tun is pretty heavy and having to lift it up to lauter height is just plain awkward. It’s not impossible but I usually do that kind of lifting with a brew partner, not on my own. So, again, no savings there.

We’ll have to see how the end result is to really determine whether the process is worth it. It didn’t save me time and the efficiency seems to be about the same whether I sparge or no-sparge.

Stay tuned for tasting results.