Geez… Almost the same as the last post.
Last brewing day, new lens, random pics.
Here you go: 
Geez… Almost the same as the last post.
Last brewing day, new lens, random pics.
Here you go:
Haven’t done much brewing at home these last few months but the last time I did I made a bit of an effort to take a few pictures with a recently acquired lens. Nothing special here but some random “artsy” shots from the day.
Enjoy!
")
")
")
Got invited a little while ago to brew with the Four Fathers. They’re an Elora-based start up brewery or concept brewery that is just starting to get off the ground with a few good beers and recipes.
I met the Four Fathers when they came to Grand River Brewing for a brew day. We hung out for the day on “my” brew system and had a great time. At the end of the day they invited me to their brewery for a brew day. “It’ll be fun”, they said. “We’ll have a great time”, they said.
They weren’t wrong. Here is what greeted me upon my arrival at “the brewery”:


(Please see title of this blog post LOL)
Behind the scenes, however, it was closer to my usual brewing experience:

Controlled chaos, moments of confusion, missed timings, near boil overs, slight messiness… Really, just the usual brewing experience.
They have a Sabco BrewMagic brewing system which was a treat to brew on. New to me but if I were to do it again I would do a bit more reading on it and figure out a few more of the features of the system to allow for repeatablility of recipes and programming mash profiles etc. Would love to have one of these for my own use but will need to save up a few more dollars before that happens. 😉
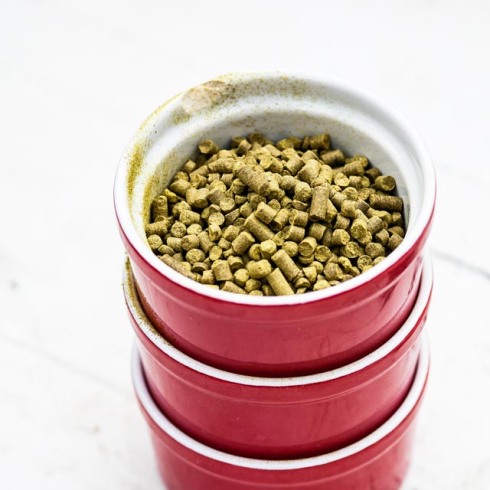
We ended up brewing a session IPA, of sorts. We’ll find out in a couple of weeks. Hopefully I’ll be able to get back to have a taste and maybe brew another beer. One more father in the mix of Four Fathers.
It’s all come together! It is, for all intents and purposes, done. There certainly is some tweaking to do and a few bits and pieces on my wish list but it works and makes a bunch of beer in one go.
My last brew day I took some pics to show the set up. Some of the line set up is not pretty but that is part of the tweaking. I’ll just have to have a few more brew days to figure it all out. 😉
This is generally what my driveway/brewery looks like on a brew day. The blue cooler is no longer a MLT but is now a bin to tote material from inside: scale, chiller, pumps, etc.

The Brewery
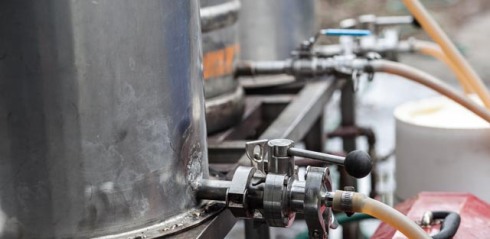
HLT set up for heating strike water. I recirculate the water as it’s heating just to avoid hot/cold layers. It makes the temp reading up top a bit more accurate. This is one place I could use an inline thermometer.

HLT
My fly sparge set up. HLT to pump to MLT. MLT to pump to BK. Flow adjusted so hot water into MLT is roughly the same rate as wort to BK. Works like a charm!

Fly sparge
Top of MLT. Foil with holes just to avoid channeling in the grain bed.

Sparging
Lauter line into BK. I had originally had the line with the tri clamp fitting as the lauter line and had that attached to the top port. This set up is better with the line going to the bottom of the BK. Less splashing, less foaming, easier to see volume when the wort gets near the top.

Lautering
This is the set up for sanitizing the chiller. For the last 15 minutes of the boil I just recirculate wort through the lines and chiller. The line set up is not pretty and I’ll be tweaking that so that the moving of lines for cooling in and chasing wort with water is a bit easier and smoother. Using the MLT as a chiller stand was a last minute thought and works well. I had originally thought about mounting the chiller on the stand but knowing now how much back flushing is required it’s easier to have it loose for now.

Sanitizing Chiller
Set up for cooling in. This basically works. The line from BK to pump needs to be on the other side of the keg the chiller is sitting on. Part of my waste water from the chiller is going back into the HLT so that when wort is done in the BK I chase the wort through the lines with the water from the HLT. This is another place I would use an inline thermometer just to adjust the flow and get the pitching temps right, or at least close.

Cooling In
There you have it! That’s basically a brew day on my new set up. Thanks to Clay for the build and thanks to Scott for the gas plumbing and pump box! Fantastic work!
Scott was at my house last night to start in on the gas plumbing for the brew stand. He has mad skillz in that regard. I held things. And took pictures.

valve and tools

Burners and pipe wrenches

Dope with pumps in the background

Love the red handled valves. Such red.
Got my burners today!

One big, one small
I have two of the large burners and one small one. I’m thinking one big burner for the HLT, small one for MLT, large one for BK.
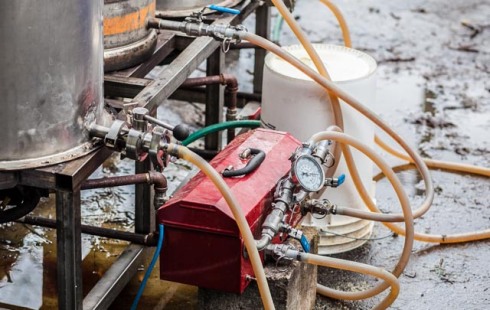
Pumps are being housed and wired by Scott. He’s got a nice method using a metal tool box to house everything and have that mounted on the brew stand. It’s protective AND portable.
More updates to come…
With the brew stand nearing completion one of the things I wanted to do was run my large volume equipment through a brew day. This is not my complete setup, I used only one of the large vessels instead of both and I don’t have my pumps hooked up yet.
My process is pretty common with this setup:
This gives me two vessels to work with and the need for only one burner. I actually use two burners in case of the need to heat the MLT. The second time I brewed on this set up I didn’t need to heat the MLT but the first time I did.
Here are a few pics of the process…
Mashed into a 50L keggle which according to my calculations would be able to hold 40lbs of grain. It did but it was completely MAXED out. No more room for anything! That was, in fact, my intent with this particular brew: max out every vessel to find out what my volume limits were. I found out. 😉

MLT maxed out
Tried a new technique for me this time: fly sparging. It’s just setting the flow of sparge water to match the flow of lautering. Not difficult it’s just that I had never been set up for that before. Discovered it’s the best thing ever! It’s just too easy and there’s really no babysitting of the MLT or much scooping of water involved.

My fly sparge setup.
I did heat my MLT half way through the rest to bring the temp back up. With the MLT maxed out there was really no room for much stirring so I really didn’t have an accurate sense of the temperature. After emptying the MLT I did see that there was a bit of scorching evident but I’m sure I’ll still end up with beer.

Scorch!
Lautering and boiling were just fine and got to about 80L or so pre-boil. Another new addition to my set up is the plate chiller seen in this photo on the work bench. (The pump and burner are courtesy of Scott.) Sanitizing the plate chiller prior to chilling was dead easy. I just hooked everything up in the last ten minutes of the boil and ran the boiling wort through the system. This dropped the temp a bit and halted the boil for a minute or so but I just kept running the system and the boil came back. Super easy!

Sanitizing the chiller
The chilling and cooling in itself was super easy. Once the boil was done I whirlpooled and rested (manually, just by stirring the BK). My chiller was already set up from the sanitizing stage so all I had to do was get my carboys in place and fire it up. With this set up and the water turned on about a half turn on the faucet I was able to cool and transfer the full volume of about 80L in just 10 minutes! You can also see it’s reasonably aerated, not something I’ve worried about a whole lot but it’s certainly not a gentle transfer.
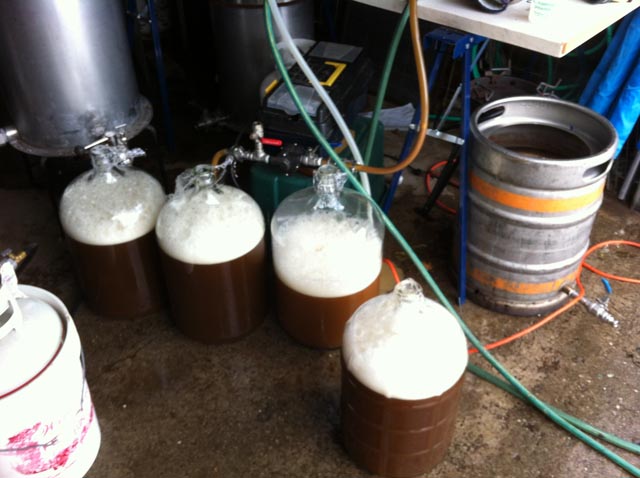
Cooling in
There are a few things that will be changing with this setup and moving to the brew stand: My pumps will be wired in, burners will be in place, less moving of vessels, more space for me to move around. All of this… Soon.
Well, it’s in my garage!
Clay finished all the welding on the weekend and I was able to pick it up this evening. None of the hardware–Pumps, gas lines, burners–is mounted but most of it waits patiently. It certainly does a bang up job of holding all the vessels with a decent amount of space in between and VERY solid support.
Here is a gallery of photos courtesy of Clay. I wasn’t around for the build but he took some really fine pictures to show the various stages of assembly. Thanks for that!


Another fun project on the go. This time in collaboration with a few people from my homebrew club: GRAB. We’re getting a barrel!
My good friend, Peter, alerted me to an offer that the Montrealers (Montreal’s homebrew club) were getting. It turns out the family of one of their members lives near a winery and the winery was getting rid of some used surplus barrels. For cheap!
Peter contacted me and with very little thought I went ahead and reserved one through him. He was kind enough to do all the logistics and is currently storing the barrel at his place until I’m able to get there for pick up.
Now it’s just a matter of deciding what to do with it. We’ll definitely do some sort of big brew into it with the members of GRAB and that is in discussion on our forum but one of the more important decisions is exactly WHAT to brew into it. Your input is welcome on this. We do know it was a red wine, Frontenac varietal, American oak barrel. Let’s go with that.
Here are a variety of pictures of what I bought with thanks to Peter Christensen and Sebastian Verreault for the photos:


I’m embarking on a new brewery project: A brew stand!
My friends Clay and Scott are rather handy folks with “mad skillz”. They have built a brew stand before for other friends of theirs and I’m in the market for something similar.
The basic design of the stand is very similar to this but we’ll be adding extras, of course. I’m looking into burners, a pump, chiller, lines, etc., all that to be figured out later.
I realize readership of this blog is a bit limited but I’ll ask both of you: What do you want in a brew stand?
